Setting Up Your End-of-Arm Payload
Manual Configuration
Navigate to:Initial → Base → Payload → End


Automatic Payload Identification
You can also watch Fairino's video tutorial on how to perform automatic payload calibration.Navigate to:
Initial → Base → Payload → End
Then select the "Identification Motion" button, indicated by the arrow in the image below.
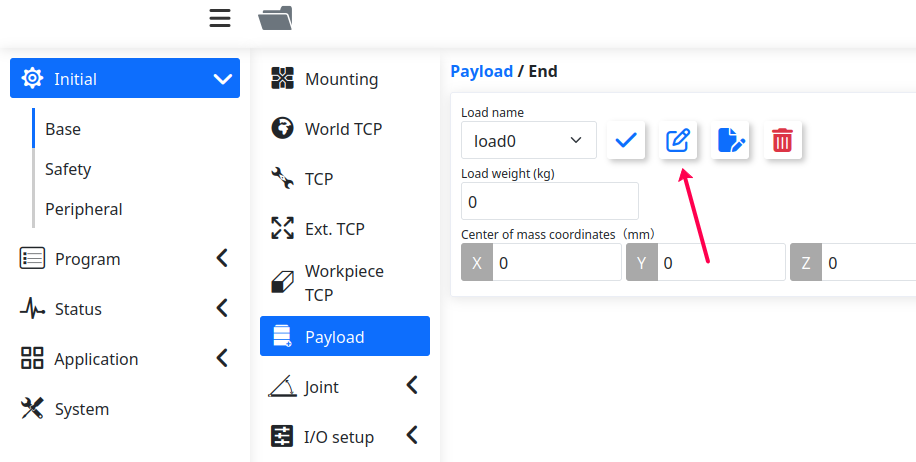
This will open the Automatic Identification settings used to calculate the payload mass and centroid.
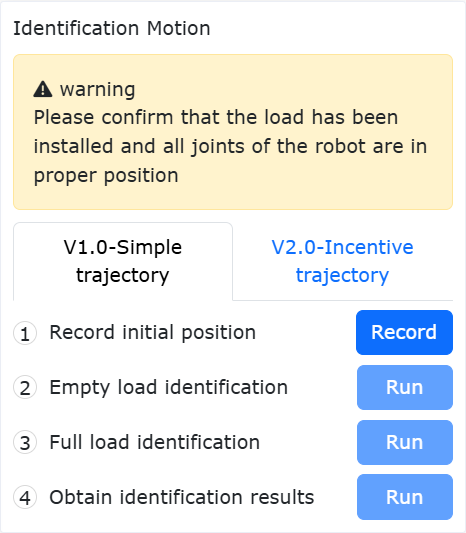
Using V1.0 Simple Trajectory
Step 1 — Prepare the Robot
Before starting:
Move the robot arm to a 90-degree position, as seen below.
Remove any payload attached to the robot.
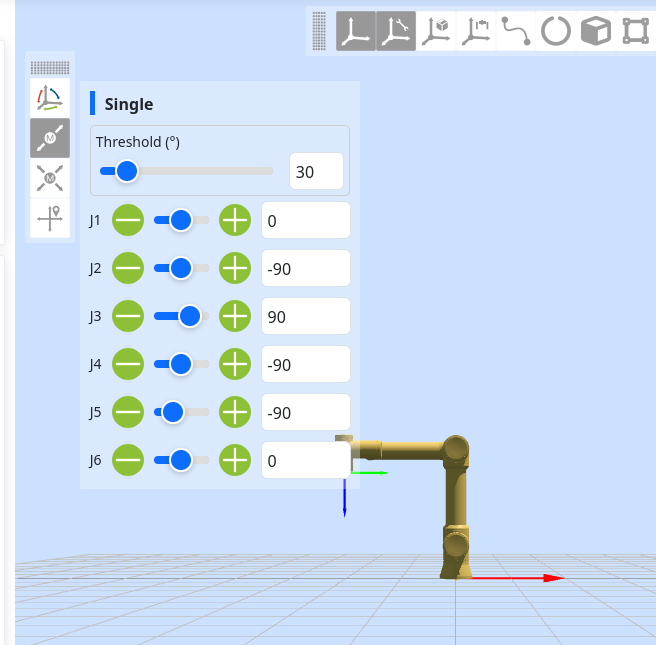
Move the robot arm to a 90-degree position, as seen below.
Remove any payload attached to the robot.
Step 2 — Record Initial Position
Step 3 — Empty Load Identification
Select Empty Load Identification while the robot has no payload attached, and wait for the identification process to complete.
Step 4 — Full Load Identification
Select Full Load Identification
Wait for the process to complete
Select Obtain
Select Apply Results
Select Full Load Identification
Wait for the process to complete
Select Obtain
Select Apply Results

Verify Robot Mounting Configuration
Navigate to:
Initial → Base → Mounting
Ensure the mounting configuration shown on this screen matches the robot’s actual physical installation.
Verify End-of-Arm Payload Configuration
Make sure the end-of-arm payload parameters are configured correctly, including:
Payload mass
Payload centroid
Update the Robot Software
Ensure the robot is running the latest software version.
For software update instructions, refer to our software update guide.
Related Articles
Setting Up a DH Robotics AG Gripper
Setting up your DaHuan (DH) Gripper with the Fairino Robot To set up a DH gripper to communicate through the end of arm port, you will need: - 1 DH Gripper - 1 Fairino Robot - 1 8pin->5pin adapter Step1: Connect the cable from the gripper to the ...Setting Collision Level
Fairino Collision detection sensitivity The Fairino robotic arms are Cobots, meaning they are meant to work around people safely. A key to accomplishing this is the "Collision detection" setting. This article will cover how to set the collision level ...Setting Up a DH Robotics Gripper - Alternative Approaches
Overview This article outlines two alternative approaches to setting up a DH gripper when connection to the 5-pin port at the flange of a Fairino cobot is unavailable or not desired. Instead of using the default method for connecting the gripper to ...Fairino FAQ
Q: How do I connect my DH gripper to my Fairino? A: Follow the instructions linked here ...Connecting an XJC Force/Torque Sensor to Fairino Cobot
This article will cover the steps needed to connect your XJC force/torque sensor to the end of a Fairino Cobot arm Hardware required: - 1 XJC force sensor - 1 Fairino Cobot - 1 computer with ethernet connection to Control box/button box OR 1 teach ...